Get the Firmware
Select and download the ATmega16U2 firmware (*.hex) for UMS Mega series.
- UMS Mega Control Firmware
- UMS Mega Keys Firmware
- UMS Mega Scratch Firmware
- UMS Mega Fx Firmware
- UMS Traktorino Firmware
Set the Arduino Board to DFU Mode
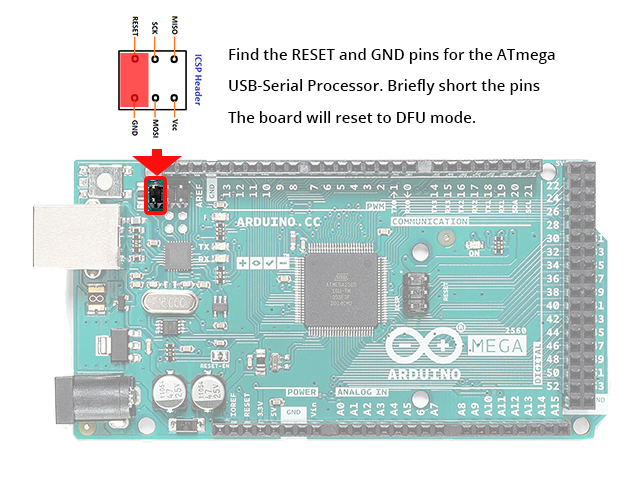
Make sure you have reset the ATmega16U2 to put it in DFU mode (Device Firmware Update).
UNO R3 and Mega R3 boards use an Atmega16U2 chip as a USB-to-serial converter. By setting a board to DFU mode you can upload USB-to-Serial firmware to the chip.
- Connect the board to your computer
- Find the RESET and GND pins for the ATmega USB-Serial Processor. They are the innermost two pins of the six located close to the USB port.
- Briefly short the pins
- The board will reset to DFU mode.

Flash the MIDI Firmware
Using FLIP (Windows)
- Download and install FLIP.
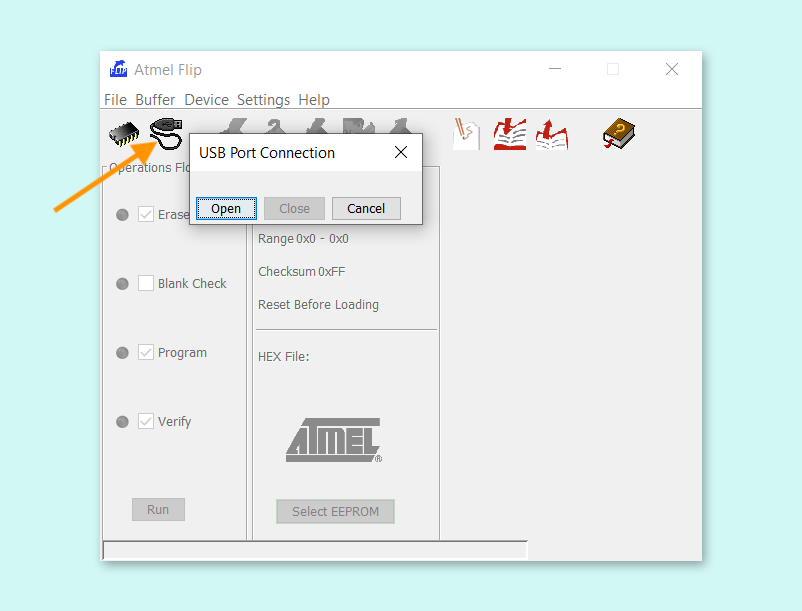
- Open the Flip software.
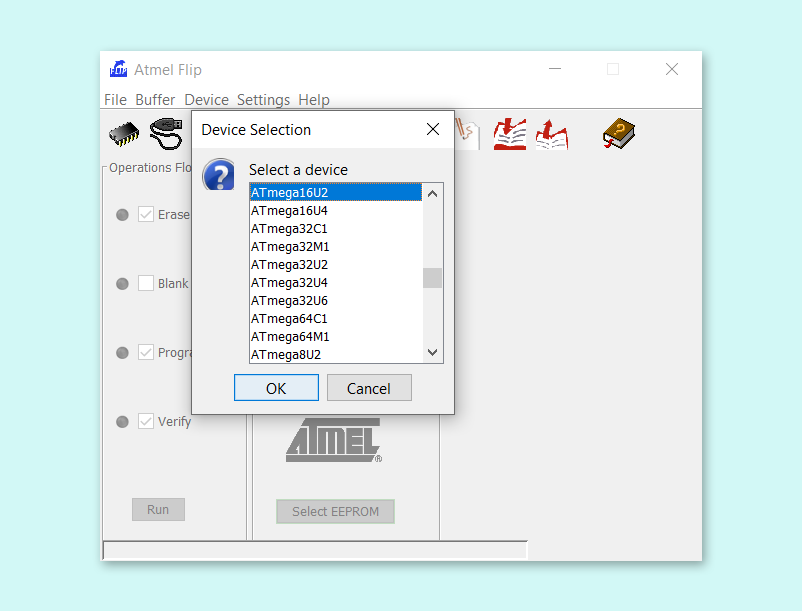
- Select the device name ATmega16U2 and click ‘OK’.
- Click the Cable button, select USB, then click Open.

- In the menu, click Device > Select…

- Click File > Load HEX File…
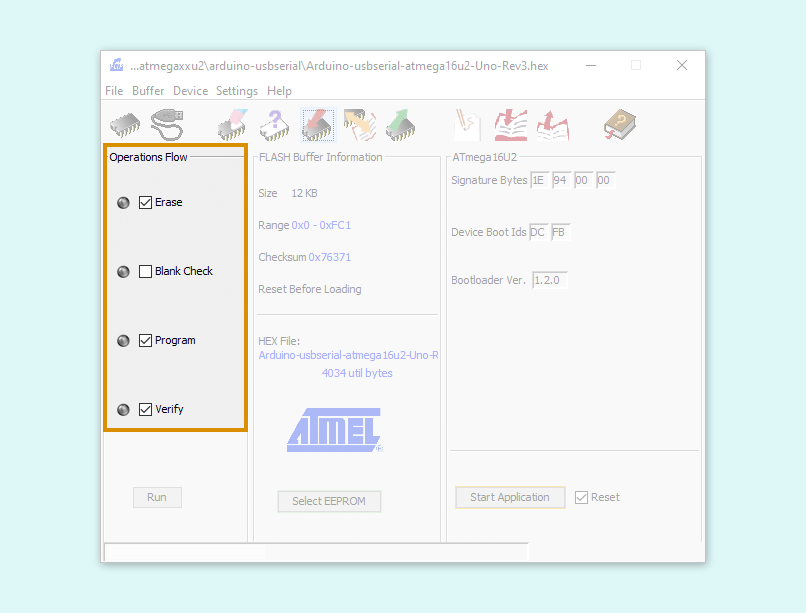
- Select your driver
.hexfile and click ‘OK’. - Make sure Erase, Program, and Verify are checked, and click ‘Run’.

- Disconnect and reconnect the board to your computer.
- Once this is finished, you can unplug the Arduino. Now it is no longer in DFU mode.
- Go back to the Device Manager, and check if the Arduino shows up as a MIDI device, under ‘Sound, video and game controllers’.
- Now your Arduino is a working MIDI controller!
Users with older PC may encounter this error – “AtLibUsbDfu.dll” is not found. To fix this:
- Download the driver file AtLibUsbDfu.dll here.
- Save drive file to to “C:\Program Files (x86)\Atmel\Flip 3.4.7\usb“
- Open Device Manager
- Look for “Unknown Device”
- If there is no unknown device, plug in the board and reset. See Set the Arduino Board to DFU Mode
- The device should show up.
- Right click the entry and select “update driver”
- Select “Search for driver on computer”
- Navigate to “C:\Program Files (x86)\Atmel\Flip 3.4.7\usb” or where you installed FLIp
- Confirm the directory
- The computer will find the correct driver and install it
Using dfu-programmer (macOS/Linux)
- Download dfu-programmer from the GitHub repository or install the
dfu-programmerpackage using a package manager like homebrew (macOS) or apt-get (Ubuntu). - Connect the board to your computer.
- Set the board to DFU mode.
- Open Terminal.
- Identify the chip model by trying the following commands:
dfu-programmer atmega16u2 read dfu-programmer atmega8u2 read
Note: For older versions of dfu-programmer, replacereadwithdumpfor the commands above.
One of these command should read the memory successfully, and print it to terminal or indicate if it’s empty. Use the name from the successful command in the following steps.
- Erase the memory.
dfu-programmer <atmegaxxu2> erase
- Flash the firmware.
dfu-programmer <atmegaxxu2> flash <firmware path> - Disconnect and reconnect the board to your computer.
Click on the link below to see this instuction on Arduino Support.
https://support.arduino.cc/hc/en-us/articles/4408887452434-Flash-USB-to-serial-firmware-in-DFU-mode
