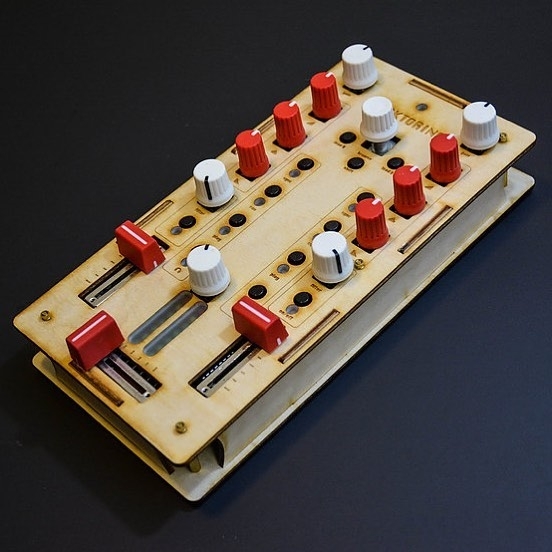
UMS Mega Traktorino
We’ve Expanded Traktorino!
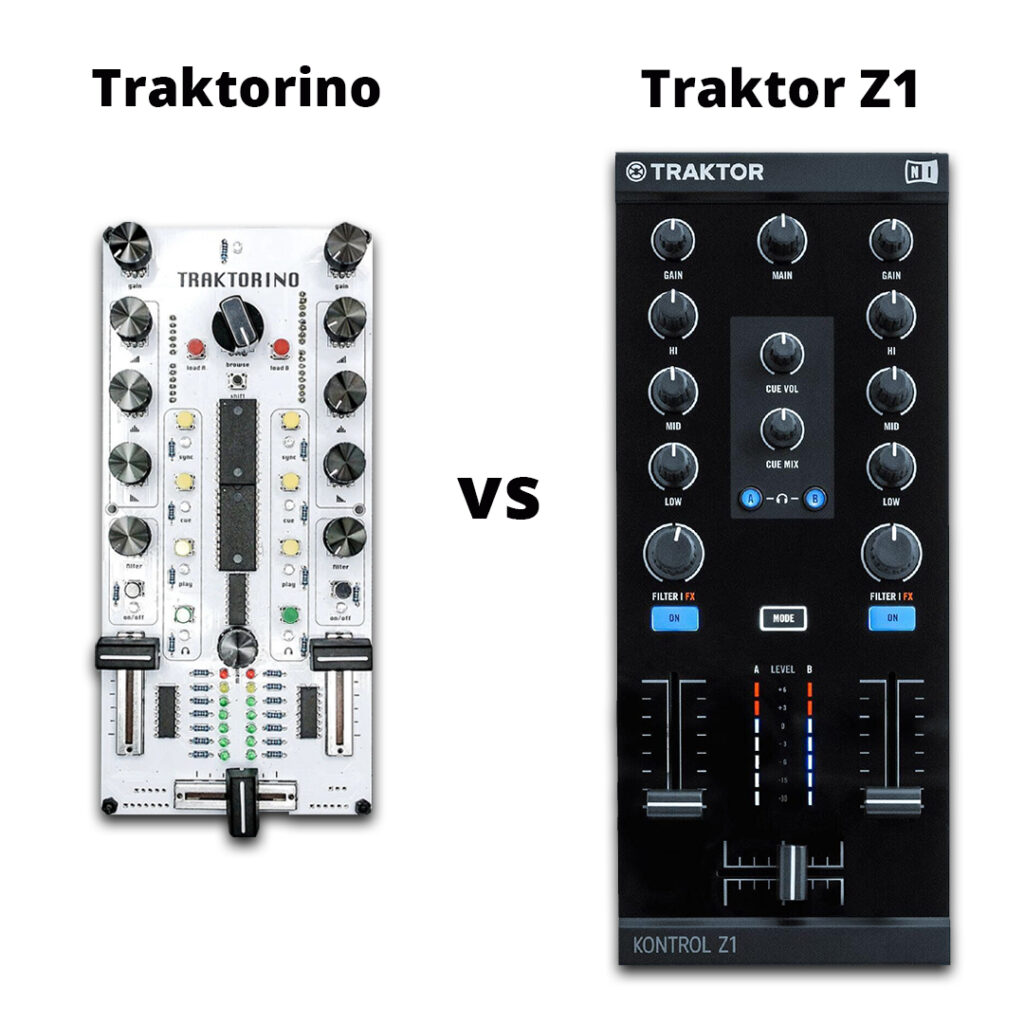
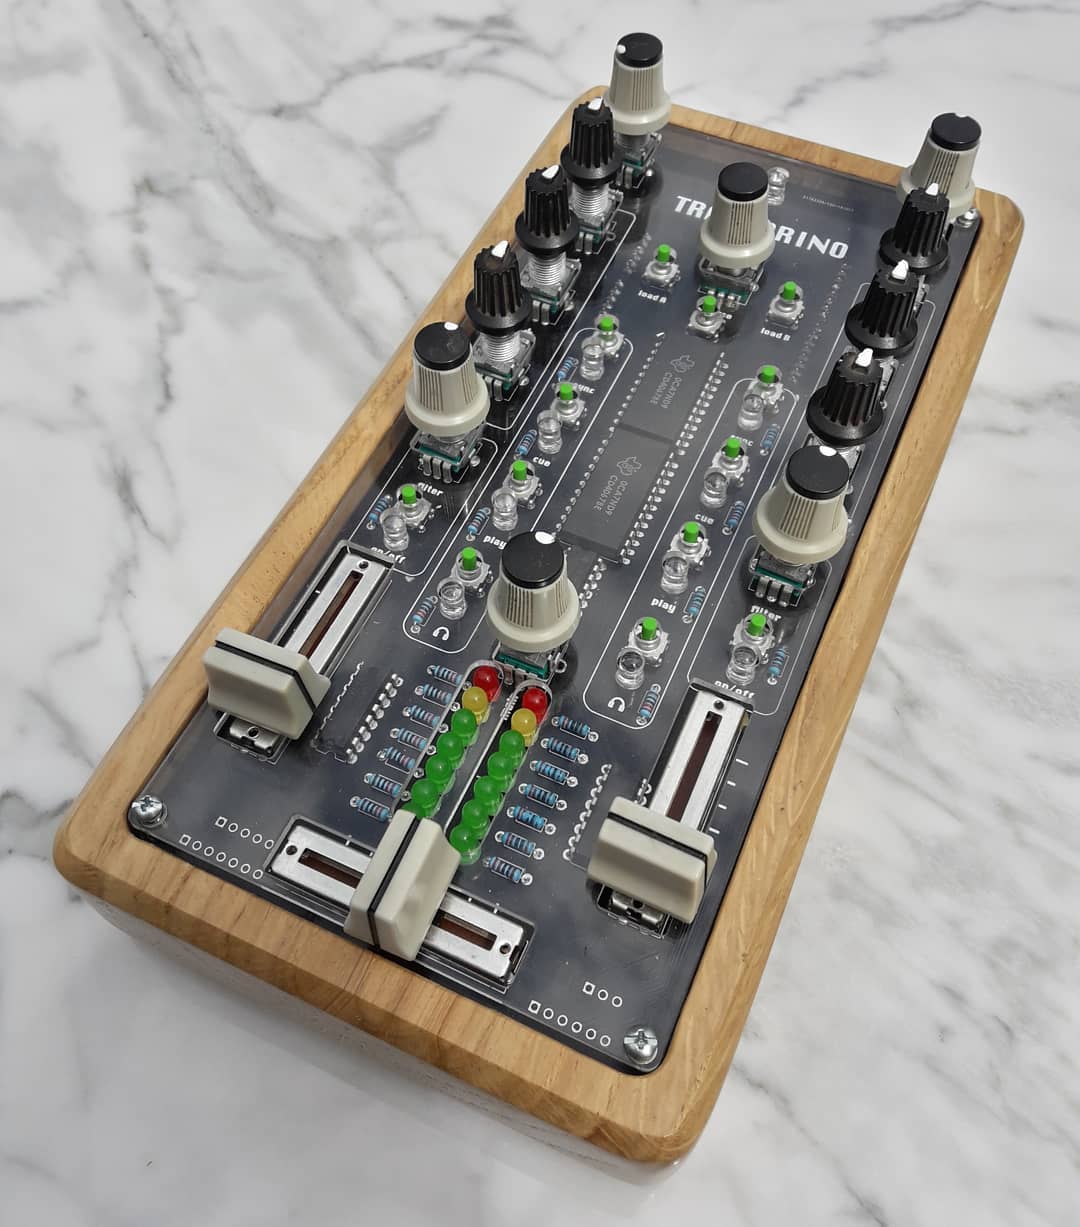
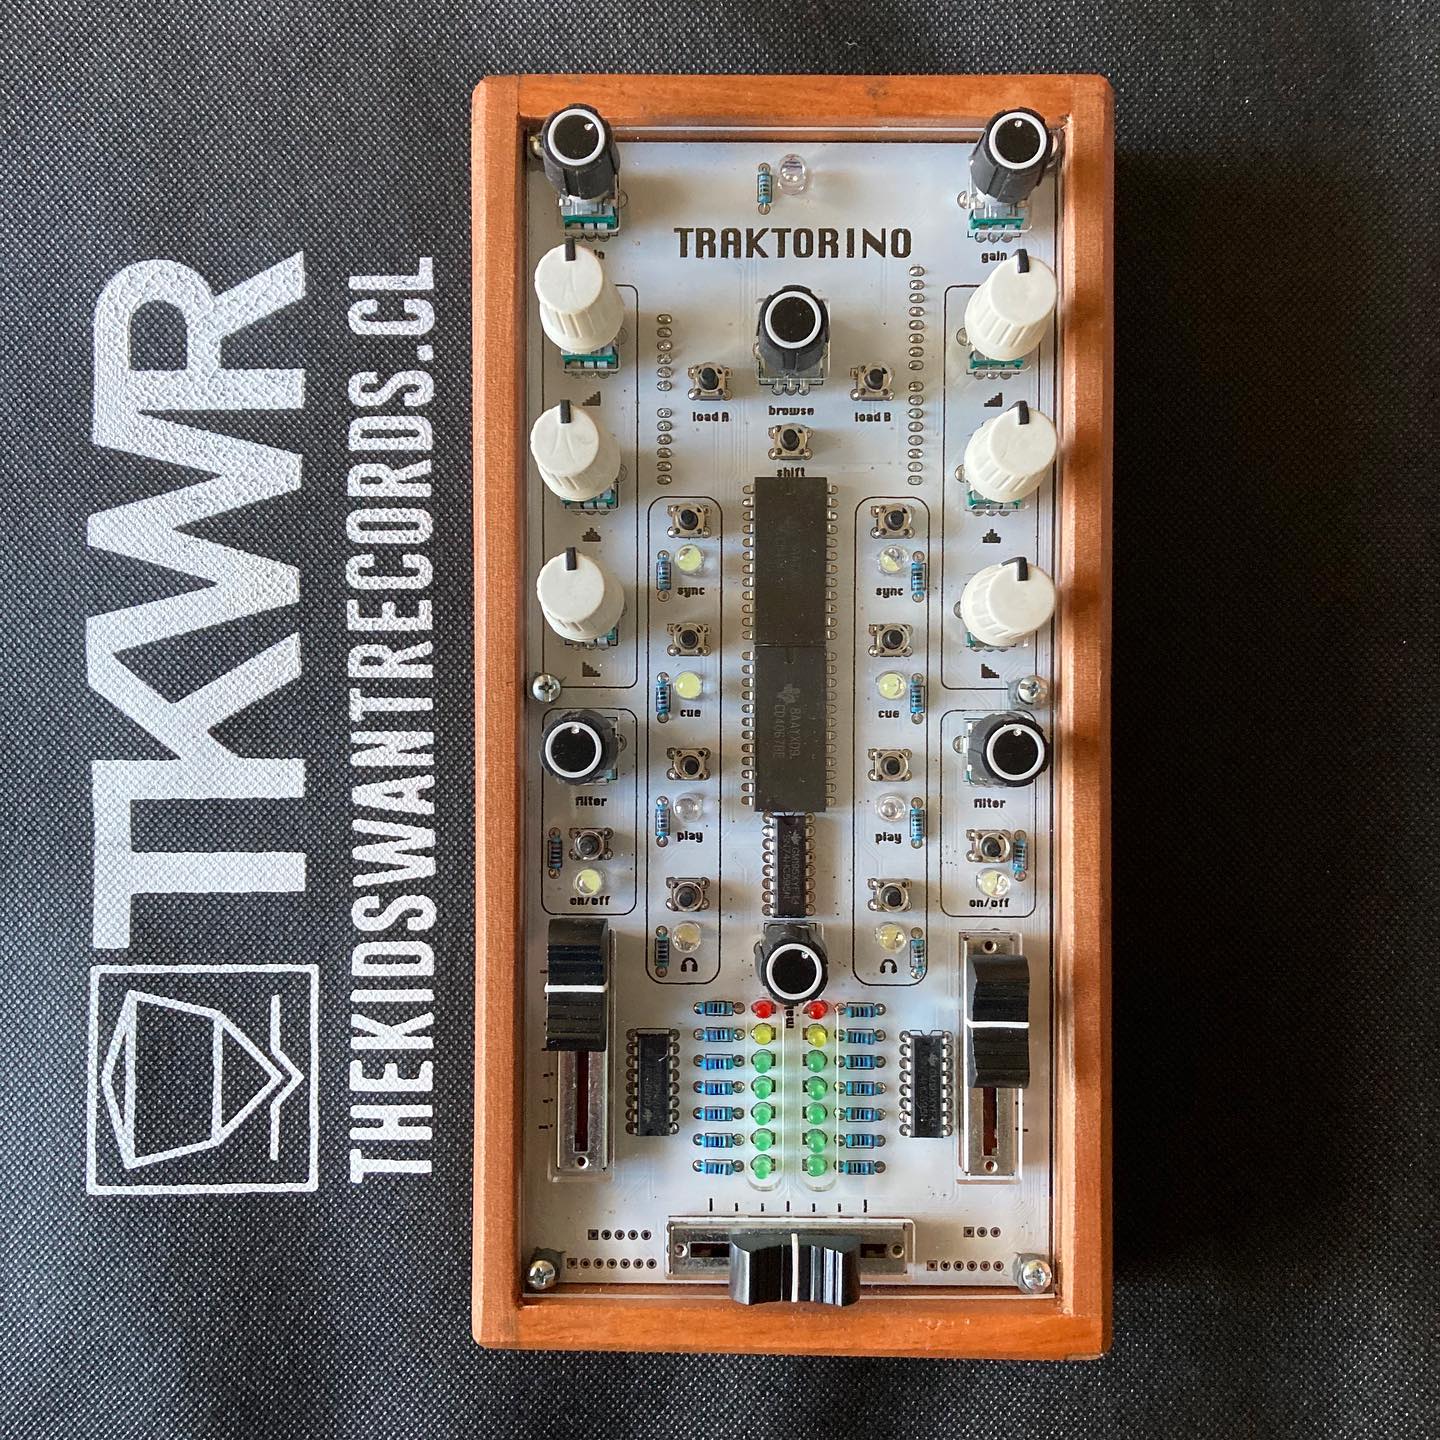
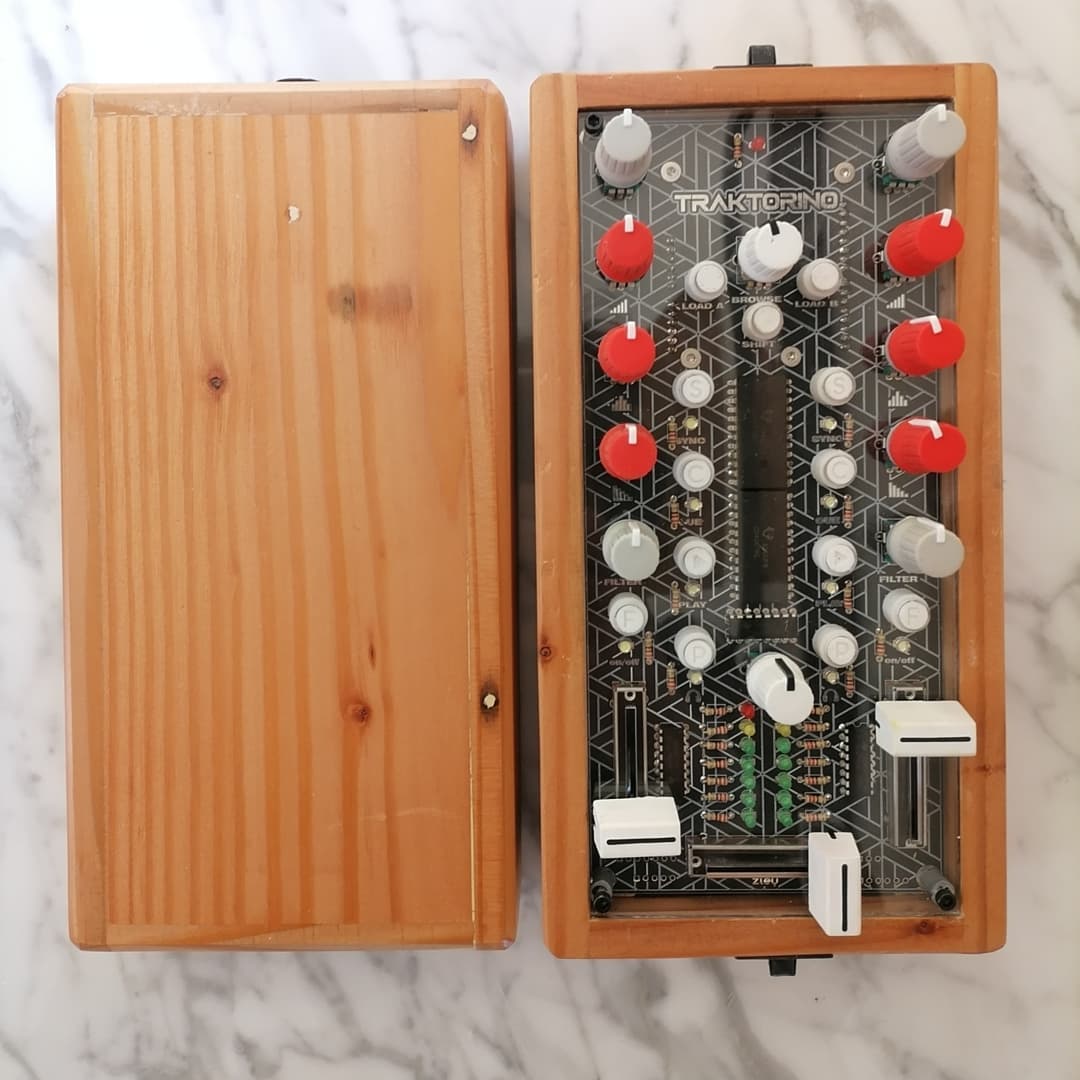
The Traktorino is a low-cost, DIY MIDI controller for DJs. It can control any software that accepts MIDI, such as Traktor, Serato, or Ableton Live. In this project, we have made some expansions to Traktorino to match closer to the Controller Interface of Traktor Z2 Mixer.
To make this happen, we have employed a 16-Channel Multiplexer to expand Traktorino.
The new additions include:
- 8 Mappable Cue Buttons
- Flux / Tap Button
- Marco FX Panels including D/W, FX knobs + Fx Pre/Post Button
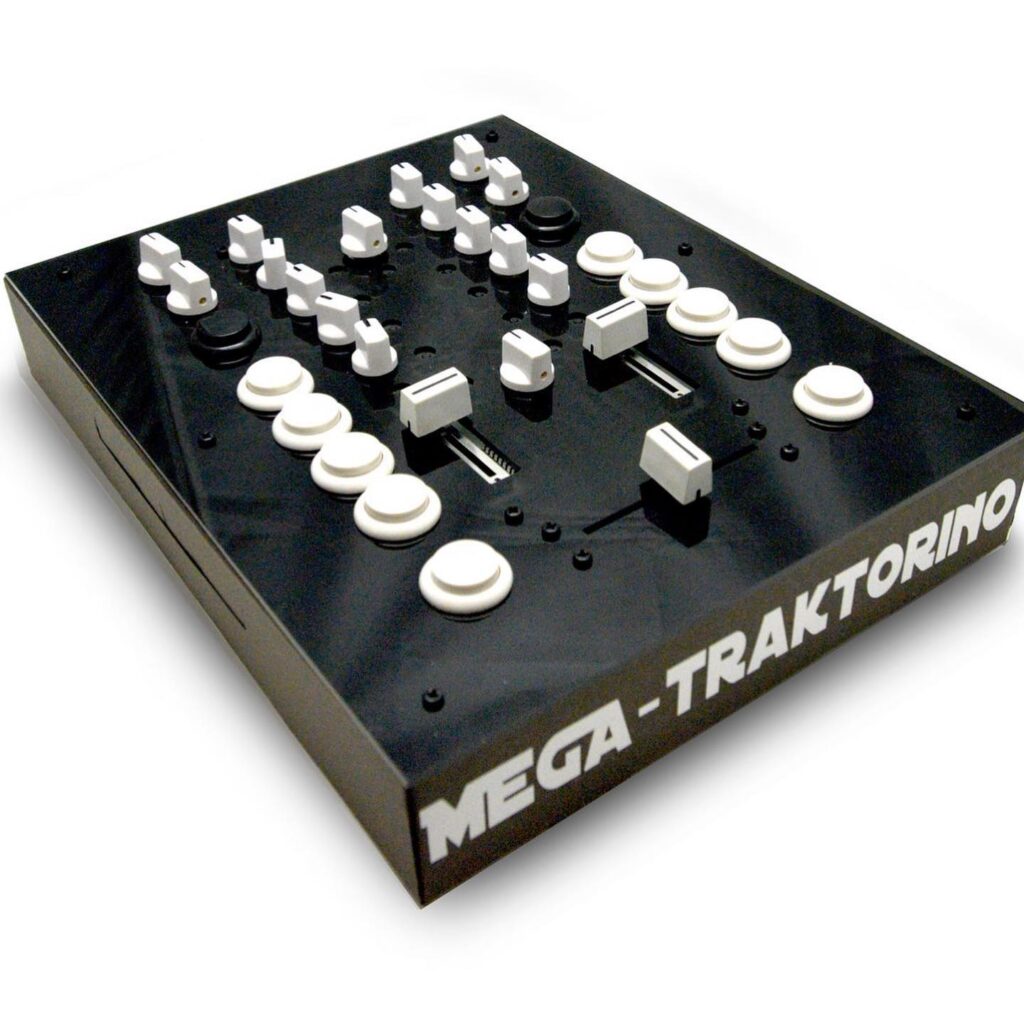
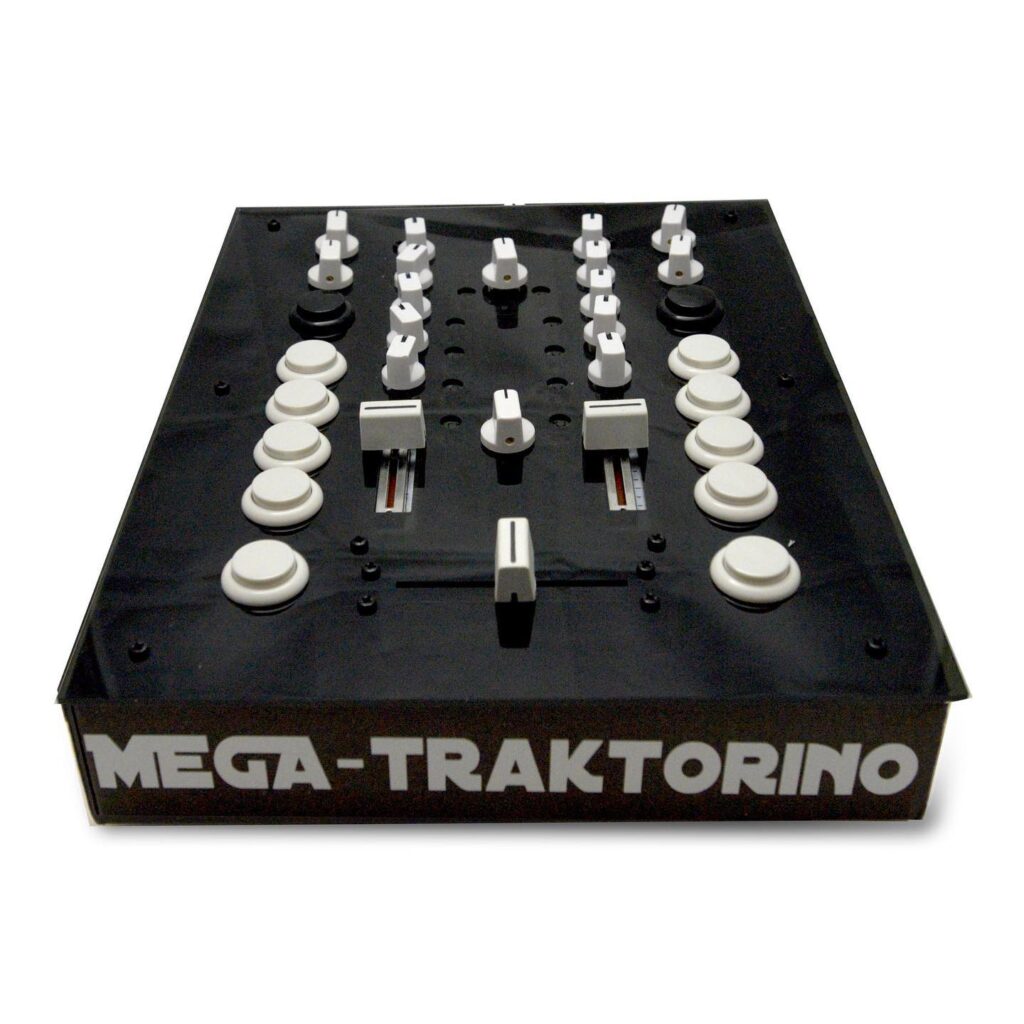
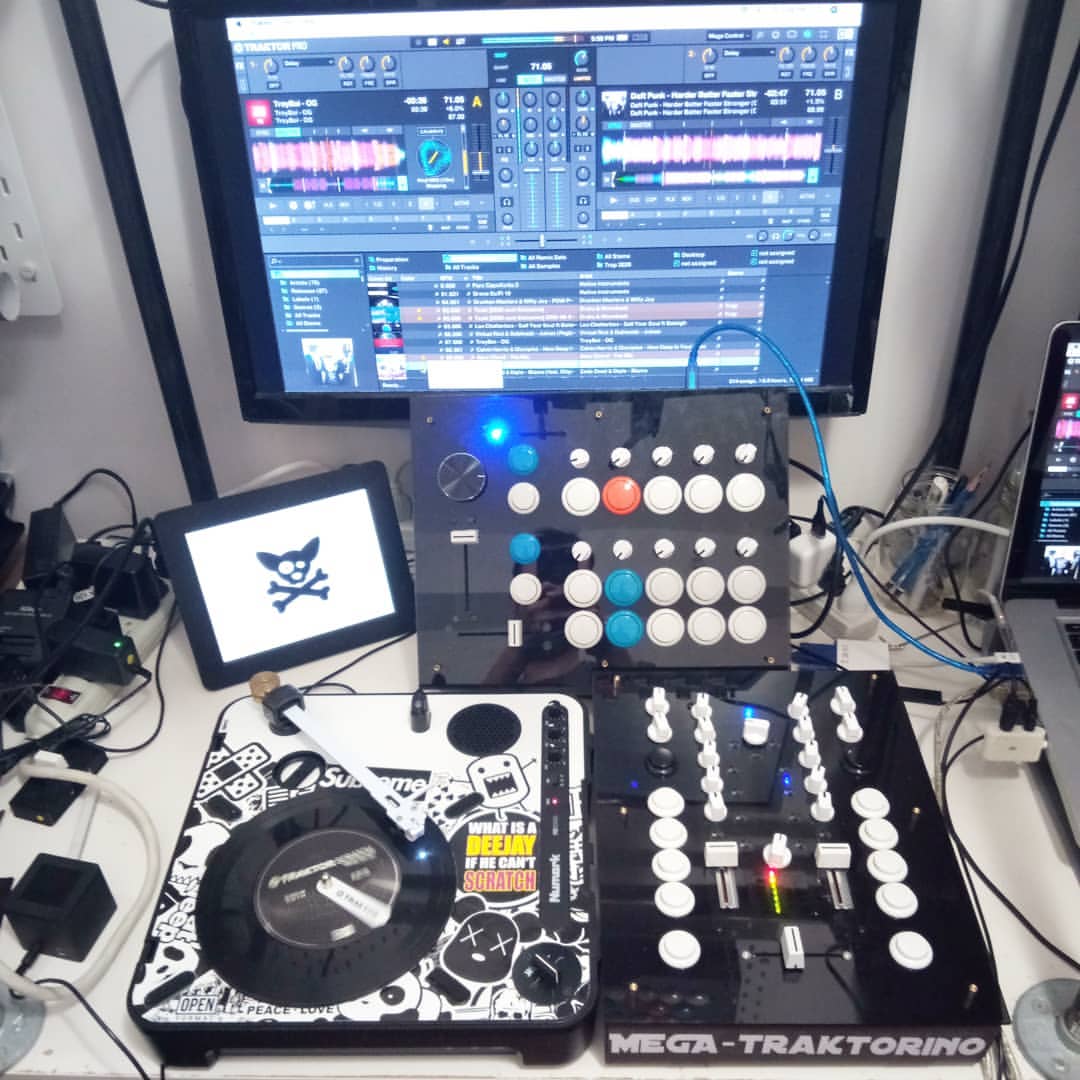
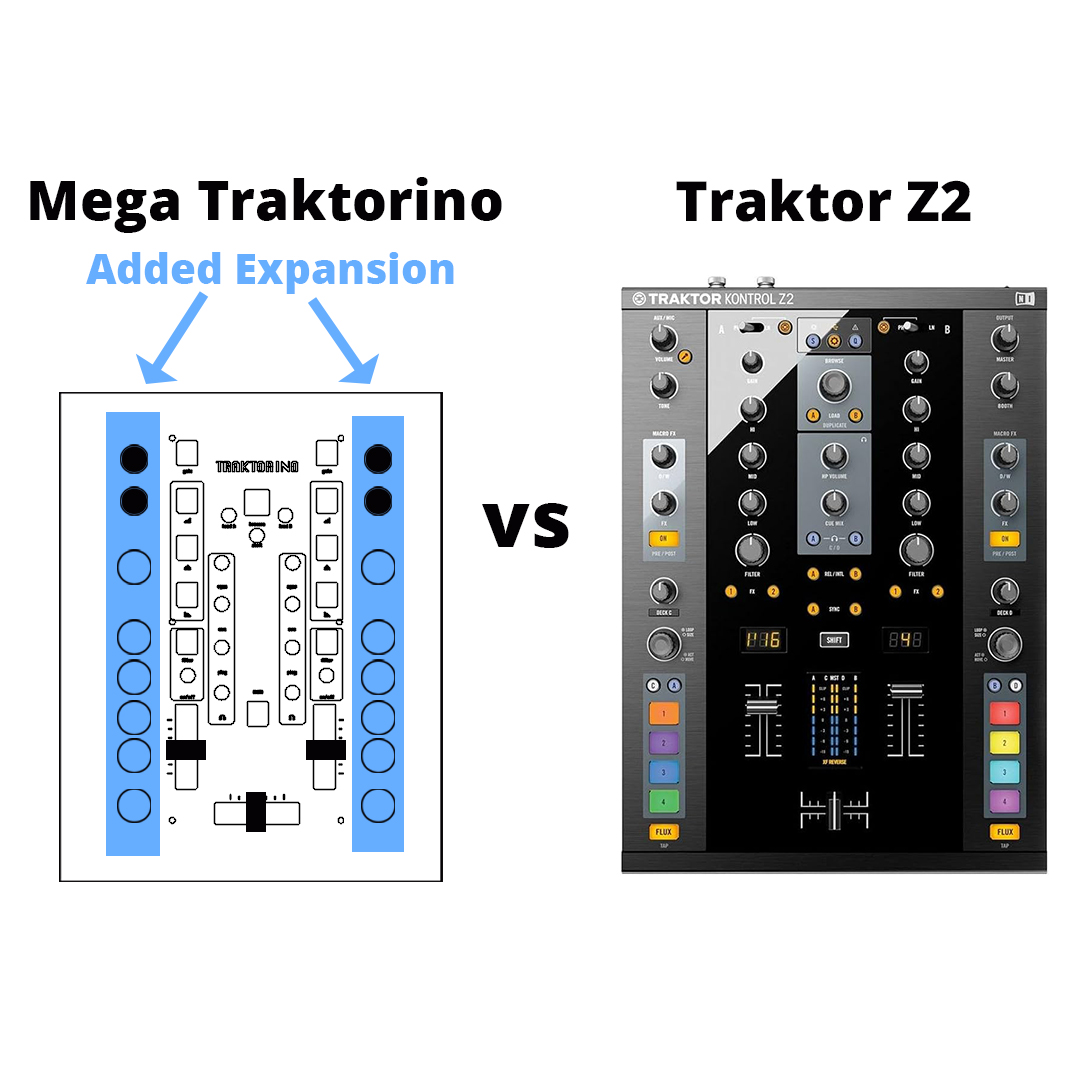
Cue + Flux + Macro Fx
8 Mappable Cue Buttons
Flux / Tap Button
Marco FX Panels including D/W, FX knobs + Fx Pre/Post Button
Material
16 Channel CD74HC4067 Analog/Digital Multiplexer
This is a breakout board for the very handy 16-Channel Analog/Digital Multiplexer/Demultiplexer CD74HC4067. This chip is like a rotary switch – it internally routes the common pin (COM in the schematic, SIG on the board) to one of 16 channel pins (CHANxx).
It works with both digital and analog signals (the voltage can’t be higher than VCC), and the connections function in either direction. To control it, connect 4 digital outputs to the chip’s address select pins (S0-S3), and send it the binary address of the channel you want. This allows you to connect up to 16 sensors to your system using only 5 pins!
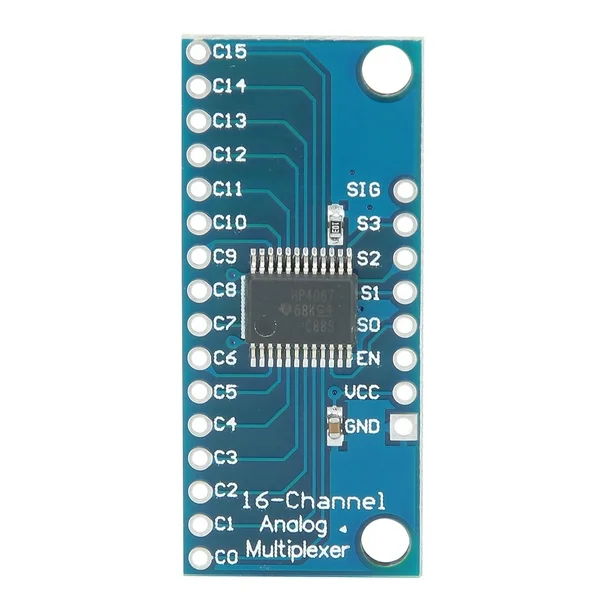
Schematic Diagram
Coming soon!
Code
We would like to thank Gustavo Silveira (aka Music Nerd), as the sketch is heavily modified from his version.
/* Traktorino

   The Traktorino is a low-cost DIY MIDI controller for DJs, based in the Arduino platform.
   It can control any software that accepts MIDI, like Traktor, Serato, or even Ableton Live.
   The Traktorino is completely open-source, which means you can download the code and all the schematics, so you can make one yourself!
   And if you want to build this controller, you can buy the kit from us, this way, you will be helping more projects like this to happen!

   http://www.musiconerd.com/shop >> buy a Traktorino kit
   http://www.musiconerd.com/traktorino >> learn more about the Traktorino
   http://github.com/silveirago/traktorino >> Download the traktorino files
   [email protected] >> Send me a message if you have any doubt

*/

/////////////////////////////////////////////
// PWM bit shifter
// You can choose the latch pin yourself.
const int ShiftPWM_latchPin = 8;

// ** uncomment this part to NOT use the SPI port and change the pin numbers. This is 2.5x slower **
#define SHIFTPWM_NOSPI
const int ShiftPWM_dataPin = 11;
const int ShiftPWM_clockPin = 12;

// If your LED's turn on if the pin is low, set this to true, otherwise set it to false.
const bool ShiftPWM_invertOutputs = false;

// You can enable the option below to shift the PWM phase of each shift register by 8 compared to the previous.
// This will slightly increase the interrupt load, but will prevent all PWM signals from becoming high at the same time.
// This will be a bit easier on your power supply, because the current peaks are distributed.
const bool ShiftPWM_balanceLoad = false;

/////////////////////////////////////////////
// LIBRARIES
#include <ShiftPWM.h>  // Bit shifter library >> https://github.com/elcojacobs/ShiftPWM - include ShiftPWM.h after setting the pins!
// If using with ATmega328 - Uno, Mega, Nano...
#include <MIDI.h> // MIDI library (by Forty Seven Effects) >> https://github.com/FortySevenEffects/arduino_midi_library/releases/tag/4.3.1
MIDI_CREATE_DEFAULT_INSTANCE();
#include <Multiplexer4067.h> // Multiplexer CD4067 library >> https://github.com/sumotoy/Multiplexer4067
#include <Thread.h> // Threads library (by Ivan seidel) >> https://github.com/ivanseidel/ArduinoThread
#include <StaticThreadController.h>
#include <Encoder.h> // Encoder library >> https://github.com/PaulStoffregen/Encoder


/////////////////////////////////////////////
// buttons
const byte muxNButtons = 13; // *coloque aqui o numero de entradas digitais utilizadas no multiplexer
const byte muxNAddonButtons = 12;
const byte NButtons = 1; // *coloque aqui o numero de entradas digitais utilizadas
const byte totalButtons = muxNButtons + muxNAddonButtons + NButtons;
const byte muxButtonPin[muxNButtons] = {0, 1, 2, 3, 4, 5, 9, 10, 11, 12, 13, 14, 15}; // *neste array coloque na ordem desejada os pinos das portas digitais utilizadas
const byte muxAddonButtonPin[muxNAddonButtons] = {0, 1, 2, 3, 4, 5, 6, 7, 8, 9, 10, 11};
const byte buttonPin[NButtons] = {9}; // *neste array coloque na ordem desejada os pinos das portas digitais utilizadas
int buttonCState[totalButtons] = {0}; // estado atual da porta digital
int buttonPState[totalButtons] = {0}; // estado previo da porta digital

/////////////////////////////////////////////
// debounce
unsigned long lastDebounceTime = 0;  // the last time the output pin was toggled
unsigned long debounceDelay = 5;    // the debounce time; increase if the output flickers

/////////////////////////////////////////////
// potentiometers
const byte muxNPots = 14; // *coloque aqui o numero de entradas analogicas utilizadas
const byte muxNAddonPots = 4;
const byte NPots = 0; // put the number of pots on analog pins here
const byte totalPots = muxNPots + muxNAddonPots + NPots;
const byte muxPotPin[muxNPots] = {0, 1, 2, 3, 4, 5, 6, 15, 14, 13, 12, 11, 10, 8}; // *neste array coloque na ordem desejada os pinos das portas analogicas, ou mux channel, utilizadas
const byte muxAddonPotPin[muxNAddonPots] = {12,13,14,15};
const byte potPin[NPots] = {};
int potCState[totalPots] = {0}; // estado atual da porta analogica
int potPState[totalPots] = {0}; // estado previo da porta analogica
int potVar = 0; // variacao entre o valor do estado previo e o atual da porta analogica
int lastCcValue[totalPots] = {0};

/////////////////////////////////////////////
// pot reading
int TIMEOUT = 50; //quantidade de tempo em que o potenciometro sera lido apos ultrapassar o varThreshold
byte varThreshold = 8; //threshold para a variacao no sinal do potenciometro
boolean potMoving = true; // se o potenciometro esta se movendo
unsigned long pTime[totalPots] = {0}; // tempo armazenado anteriormente
unsigned long timer[totalPots] = {0}; // armazena o tempo que passou desde que o timer foi zerado

/////////////////////////////////////////////
// encoder
Encoder myEnc(3, 2);
long oldPosition  = -10;

/////////////////////////////////////////////
// midi
byte midiCh = 1; // *Canal midi a ser utilizado
byte note = 36; // *Nota mais grave que sera utilizada
byte cc = 1; // *CC mais baixo que sera utilizado

int ccLastValue = 0;

/////////////////////////////////////////////
// Leds
const byte ledNum = 24; // total number of leds used
unsigned char maxBrightness = 255;
unsigned char pwmFrequency = 75;
unsigned int numRegisters = 3;
unsigned int numOutputs = numRegisters * 8;
unsigned int numRGBLeds = numRegisters * 8 / 3;
unsigned int fadingMode = 0; //start with all LED's off.

unsigned int VuL[7] = {1, 2, 3, 4, 5, 6, 7}; // VU left pins
unsigned int VuR[7] = {15, 14, 13, 12, 11, 10, 9}; // VU righ pins
unsigned int buttonsLedL[5] = {20, 19, 18, 17, 16};
unsigned int buttonsLedR[5] = {8, 0, 23, 22, 21};

unsigned int red = 180;
unsigned int green = 255;
unsigned int blue = 10;
unsigned int yellow = 100;

byte ledOnOffPin = 10; //On Off pin

/////////////////////////////////////////////
// Multiplexer
Multiplexer4067 mplexPots = Multiplexer4067(4, 5, 6, 7, A0);
Multiplexer4067 mplexButtons = Multiplexer4067(4, 5, 6, 7, A1);
Multiplexer4067 mplexAddon = Multiplexer4067(4, 5, 6, 7, A5);

/////////////////////////////////////////////
// threads - programa cada atividade do Arduino para acontecer em um determinado tempo
Thread threadReadPots; // thread para controlar os pots
Thread threadReadButtons; // thread para controlar os botoes
StaticThreadController<2> cpu(&threadReadPots, &threadReadButtons); //thread master, onde as outras vao ser adicionadas

/////////////////////////////////////////////
void setup() {
  Serial.begin(31250); // 115200 for hairless - 31250 for MOCO lufa

  MIDI.turnThruOff();

  /////////////////////////////////////////////
  // Midi in
  MIDI.setHandleControlChange(handleControlChange);
  MIDI.setHandleNoteOn(handleNoteOn);
  MIDI.setHandleNoteOff(handleNoteOff);

  /////////////////////////////////////////////
  // Multiplexers
  mplexPots.begin(); // inicializa o multiplexer
  mplexButtons.begin(); // inicializa o multiplexer
  mplexAddon.begin();
  pinMode(A1, INPUT_PULLUP); // Buttons need input pull up

  /////////////////////////////////////////////
  // buttons on Arduino Digital pins
  for (int i = 0; i < NButtons; i++) { // buttons on Digital pin
    pinMode(buttonPin[i], INPUT_PULLUP);
  }

  /////////////////////////////////////////////
  // Leds
  pinMode(ledOnOffPin, OUTPUT);

  // Sets the number of 8-bit registers that are used.
  ShiftPWM.SetAmountOfRegisters(numRegisters);
  ShiftPWM.SetAll(0);
  // Sets the number of 8-bit registers that are used.
  ShiftPWM.SetAmountOfRegisters(numRegisters);
  // SetPinGrouping allows flexibility in LED setup.
  // If your LED's are connected like this: RRRRGGGGBBBBRRRRGGGGBBBB, use SetPinGrouping(4).
  ShiftPWM.SetPinGrouping(1); //This is the default, but I added here to demonstrate how to use the funtion
  ShiftPWM.Start(pwmFrequency, maxBrightness);

  /////////////////////////////////////////////
  // threads
  // pots
  threadReadPots.setInterval(10);
  threadReadPots.onRun(readPots);
  // buttons
  threadReadButtons.setInterval(20);
  threadReadButtons.onRun(readButtons);

  /////////////////////////////////////////////
  //leds
  analogWrite(ledOnOffPin, 255); // on/off led
}

void loop() {
  cpu.run();
  MIDI.read();
  readEncoder();
}

/////////////////////////////////////////////
// read buttons

void readButtons() {
  for (int i = 0; i < muxNButtons; i++) { //reads buttons on mux
    int buttonReading = mplexButtons.readChannel(muxButtonPin[i]);
    if (buttonReading > 100) {
      buttonCState[i] = HIGH;
    }
    else {
      buttonCState[i] = LOW;
    }
  }

  if (muxNAddonButtons > 0) { //reads buttons on add-on mux
    pinMode(A5, INPUT_PULLUP);
    for (int i = 0; i < muxNAddonButtons; i++) { //reads buttons on muxAddon
      int buttonReading = mplexAddon.readChannel(muxAddonButtonPin[i]);
      if (buttonReading > 100) {
        buttonCState[i + muxNButtons] = HIGH;
      }
      else {
        buttonCState[i + muxNButtons] = LOW;
      }
    }
  }

  for (int i = 0; i < NButtons; i++) { //read buttons on Arduino
    buttonCState[i + muxNButtons + muxNAddonButtons] = digitalRead(buttonPin[i]); // stores in the rest of buttonCState
  }

  for (int i = 0; i < totalButtons; i++) {
    if ((millis() - lastDebounceTime) > debounceDelay) {

      if (buttonCState[i] != buttonPState[i]) {
        lastDebounceTime = millis();

        if (buttonCState[i] == LOW) {
          MIDI.sendNoteOn(note + i, 127, midiCh); // envia NoteOn(nota, velocity, canal midi)
          buttonPState[i] = buttonCState[i];
        }
        else {
          MIDI.sendNoteOn(note + i, 0, midiCh);
          buttonPState[i] = buttonCState[i];
        }
      }
    }

  }
}

////////////////////////////////////////////
//read potentiometers

void readPots() {
  for (int i = 0; i < muxNPots; i++) { // le todas entradas analogicas utilizadas, menos a dedicada a troca do canal midi
    potCState[i] = mplexPots.readChannel(muxPotPin[i]);
  }

  if (muxNAddonPots > 0) {
    pinMode(A5, INPUT);
    for (int i = 0; i < muxNAddonPots; i++) { // reads pots on add-on mux
      potCState[i + muxNPots] = mplexAddon.readChannel(muxAddonPotPin[i]);
    }
  }

  for (int i = 0; i < NPots; i++) { // read pots attached to analog pins
    potCState[i + muxNPots + muxNAddonPots] = analogRead(potPin[i]);
  }

  for (int i = 0; i < totalPots; i++) {
    potVar = abs(potCState[i] - potPState[i]); // calcula a variacao da porta analogica

    if (potVar >= varThreshold) {  //sets a threshold for the variance in the pot state, if it varies more than x it sends the cc message
      pTime[i] = millis(); // armazena o tempo previo
    }
    timer[i] = millis() - pTime[i]; // reseta o timer
    if (timer[i] < TIMEOUT) { // se o timer for menor que o tempo maximo permitido significa que o potenciometro ainda esta se movendo
      potMoving = true;
    }
    else {
      potMoving = false;
    }

    if (potMoving == true) { // se o potenciometro ainda esta se movendo, mande o control change
      int ccValue = map(potCState[i], 0, 1023, 0, 127);
      if (lastCcValue[i] != ccValue) {
        MIDI.sendControlChange(cc + i, map(potCState[i], 0, 1023, 0, 127), 11); // envia Control Change (numero do CC, valor do CC, canal midi)
        potPState[i] = potCState[i]; // armazena a leitura atual do potenciometro para comparar com a proxima
        lastCcValue[i] = ccValue;
      }
    }
  }
}

////////////////////////////////////////////
//// read encoder
void readEncoder () {
  int newPosition = myEnc.read();
  int encoderVal = map(newPosition, -1024, 1024, -256, 256);
  int encoderValue;

  if (encoderVal != oldPosition) {
    if ((encoderVal - oldPosition) > 0) {
      encoderValue = 127;
    }
    else {
      encoderValue = 1;
    }

    MIDI.sendControlChange(14, encoderValue, 1);

    oldPosition = encoderVal;
  }
}

////////////////////////////////////////////
// led feedback
void handleControlChange(byte channel, byte number, byte value) {
  int value_ = value;

  if (value_ != ccLastValue) {

    // Left VU
    if (number == 12) {
      switch (value_) {
        case 0:
          for (int i = 0; i < 7; i++) {
            ShiftPWM.SetOne(VuL[i], LOW);
          }
          break;
        case 1:
          for (int i = 1; i < 7; i++) {
            ShiftPWM.SetOne(VuL[i], LOW);
          }
          ShiftPWM.SetOne(VuL[0], green);
          break;
        case 2:
          for (int i = 2; i < 7; i++) {
            ShiftPWM.SetOne(VuL[i], LOW);
          }
          for (int i = 0; i < 2; i++) {
            ShiftPWM.SetOne(VuL[i], green);
          }
          break;
        case 3:
          for (int i = 3; i < 7; i++) {
            ShiftPWM.SetOne(VuL[i], LOW);
          }
          for (int i = 0; i < 3; i++) {
            ShiftPWM.SetOne(VuL[i], green);
          }
          break;
        case 4:
          for (int i = 4; i < 7; i++) {
            ShiftPWM.SetOne(VuL[i], LOW);
          }
          for (int i = 0; i < 4; i++) {
            ShiftPWM.SetOne(VuL[i], green);
          }
          break;
        case 5:
          for (int i = 5; i < 7; i++) {
            ShiftPWM.SetOne(VuL[i], LOW);
          }
          for (int i = 0; i < 5; i++) {
            ShiftPWM.SetOne(VuL[i], green);
          }
          break;
        case 6:
          for (int i = 6; i < 7; i++) {
            ShiftPWM.SetOne(VuL[i], LOW);
          }
          for (int i = 0; i < 5; i++) {
            ShiftPWM.SetOne(VuL[i], green);
          }
          ShiftPWM.SetOne(VuL[5], yellow);
          break;
        case 7:
          for (int i = 6; i < 7; i++) {
            ShiftPWM.SetOne(VuL[i], LOW);
          }
          for (int i = 0; i < 5; i++) {
            ShiftPWM.SetOne(VuL[i], green);
          }
          ShiftPWM.SetOne(VuL[5], yellow);
          ShiftPWM.SetOne(VuL[6], red);
          break;
      }
    }

    // Right VU
    if (number == 13) {
      switch (value_) {
        case 0:
          for (int i = 0; i < 7; i++) {
            ShiftPWM.SetOne(VuR[i], LOW);
          }
          break;
        case 1:
          for (int i = 1; i < 7; i++) {
            ShiftPWM.SetOne(VuR[i], LOW);
          }
          ShiftPWM.SetOne(VuR[0], green);
          break;
        case 2:
          for (int i = 2; i < 7; i++) {
            ShiftPWM.SetOne(VuR[i], LOW);
          }
          for (int i = 0; i < 2; i++) {
            ShiftPWM.SetOne(VuR[i], green);
          }
          break;
        case 3:
          for (int i = 3; i < 7; i++) {
            ShiftPWM.SetOne(VuR[i], LOW);
          }
          for (int i = 0; i < 3; i++) {
            ShiftPWM.SetOne(VuR[i], green);
          }
          break;
        case 4:
          for (int i = 4; i < 7; i++) {
            ShiftPWM.SetOne(VuR[i], LOW);
          }
          for (int i = 0; i < 4; i++) {
            ShiftPWM.SetOne(VuR[i], green);
          }
          break;
        case 5:
          for (int i = 5; i < 7; i++) {
            ShiftPWM.SetOne(VuR[i], LOW);
          }
          for (int i = 0; i < 5; i++) {
            ShiftPWM.SetOne(VuR[i], green);
          }
          break;
        case 6:
          for (int i = 6; i < 7; i++) {
            ShiftPWM.SetOne(VuR[i], LOW);
          }
          for (int i = 0; i < 5; i++) {
            ShiftPWM.SetOne(VuR[i], green);
          }
          ShiftPWM.SetOne(VuR[5], yellow);
          break;
        case 7:
          for (int i = 6; i < 7; i++) {
            ShiftPWM.SetOne(VuR[i], LOW);
          }
          for (int i = 0; i < 5; i++) {
            ShiftPWM.SetOne(VuR[i], green);
          }
          ShiftPWM.SetOne(VuR[5], yellow);
          ShiftPWM.SetOne(VuR[6], red);
          break;
      }
    }
    ccLastValue = value;
  }
}

void handleNoteOn(byte channel, byte number, byte value) {
  switch (number) {
    // Left buttons
    case 40: //sync
      ShiftPWM.SetOne(buttonsLedL[0], blue);
      break;
    case 39: //cue
      ShiftPWM.SetOne(buttonsLedL[1], blue);
      break;
    case 38: //play
      ShiftPWM.SetOne(buttonsLedL[2], blue);
      break;
    case 37: //phones
      ShiftPWM.SetOne(buttonsLedL[3], blue);
      break;
    case 36: //filter on
      ShiftPWM.SetOne(buttonsLedL[4], blue);
      break;

    // Righ buttons
    case 44: //sync
      ShiftPWM.SetOne(buttonsLedR[0], blue);
      break;
    case 45: //cue
      ShiftPWM.SetOne(buttonsLedR[1], blue);
      break;
    case 46: //play
      ShiftPWM.SetOne(buttonsLedR[2], blue);
      break;
    case 47: //phones
      ShiftPWM.SetOne(buttonsLedR[3], blue);
      break;
    case 48: //filter on
      ShiftPWM.SetOne(buttonsLedR[4], blue);
      break;
  }
}

void handleNoteOff(byte channel, byte number, byte value) {
  switch (number) {
    // Left buttons
    case 40: //sync
      ShiftPWM.SetOne(buttonsLedL[0], LOW);
      break;
    case 39: //cue
      ShiftPWM.SetOne(buttonsLedL[1], LOW);
      break;
    case 38: //play
      ShiftPWM.SetOne(buttonsLedL[2], LOW);
      break;
    case 37: //phones
      ShiftPWM.SetOne(buttonsLedL[3], LOW);
      break;
    case 36: //filter on
      ShiftPWM.SetOne(buttonsLedL[4], LOW);
      break;

    // Righ buttons
    case 44: //sync
      ShiftPWM.SetOne(buttonsLedR[0], LOW);
      break;
    case 45: //cue
      ShiftPWM.SetOne(buttonsLedR[1], LOW);
      break;
    case 46: //play
      ShiftPWM.SetOne(buttonsLedR[2], LOW);
      break;
    case 47: //phones
      ShiftPWM.SetOne(buttonsLedR[3], LOW);
      break;
    case 48: //filter on
      ShiftPWM.SetOne(buttonsLedR[4], LOW);
      break;
  }
}

/*
  buttons midi order
  40 44 - sync
  39 45 - cue
  38 46 - play
  37 47 - phones
  36 48 - filter

     VU order
  7 9
  6 10
  5 11
  4 12
  3 13
  2 14
  1 15

*/
Traktorino
The Original Inspiration by Músico Nerd
Traktorino – The Open Source DIY MIDI Controller
The Traktorino is a powerful low-cost DIY MIDI controller by Músico Nerd. It is based in the Arduino platform and it comes in DIY kit, or assembled. In its core, there’s a shield that connects to an Arduino Uno, which uses open-source code, making it totally hackable.
More information on Traktorino: https://www.musiconerd.com/projects/traktorino/
Build Files:
https://github.com/silveirago/traktorino
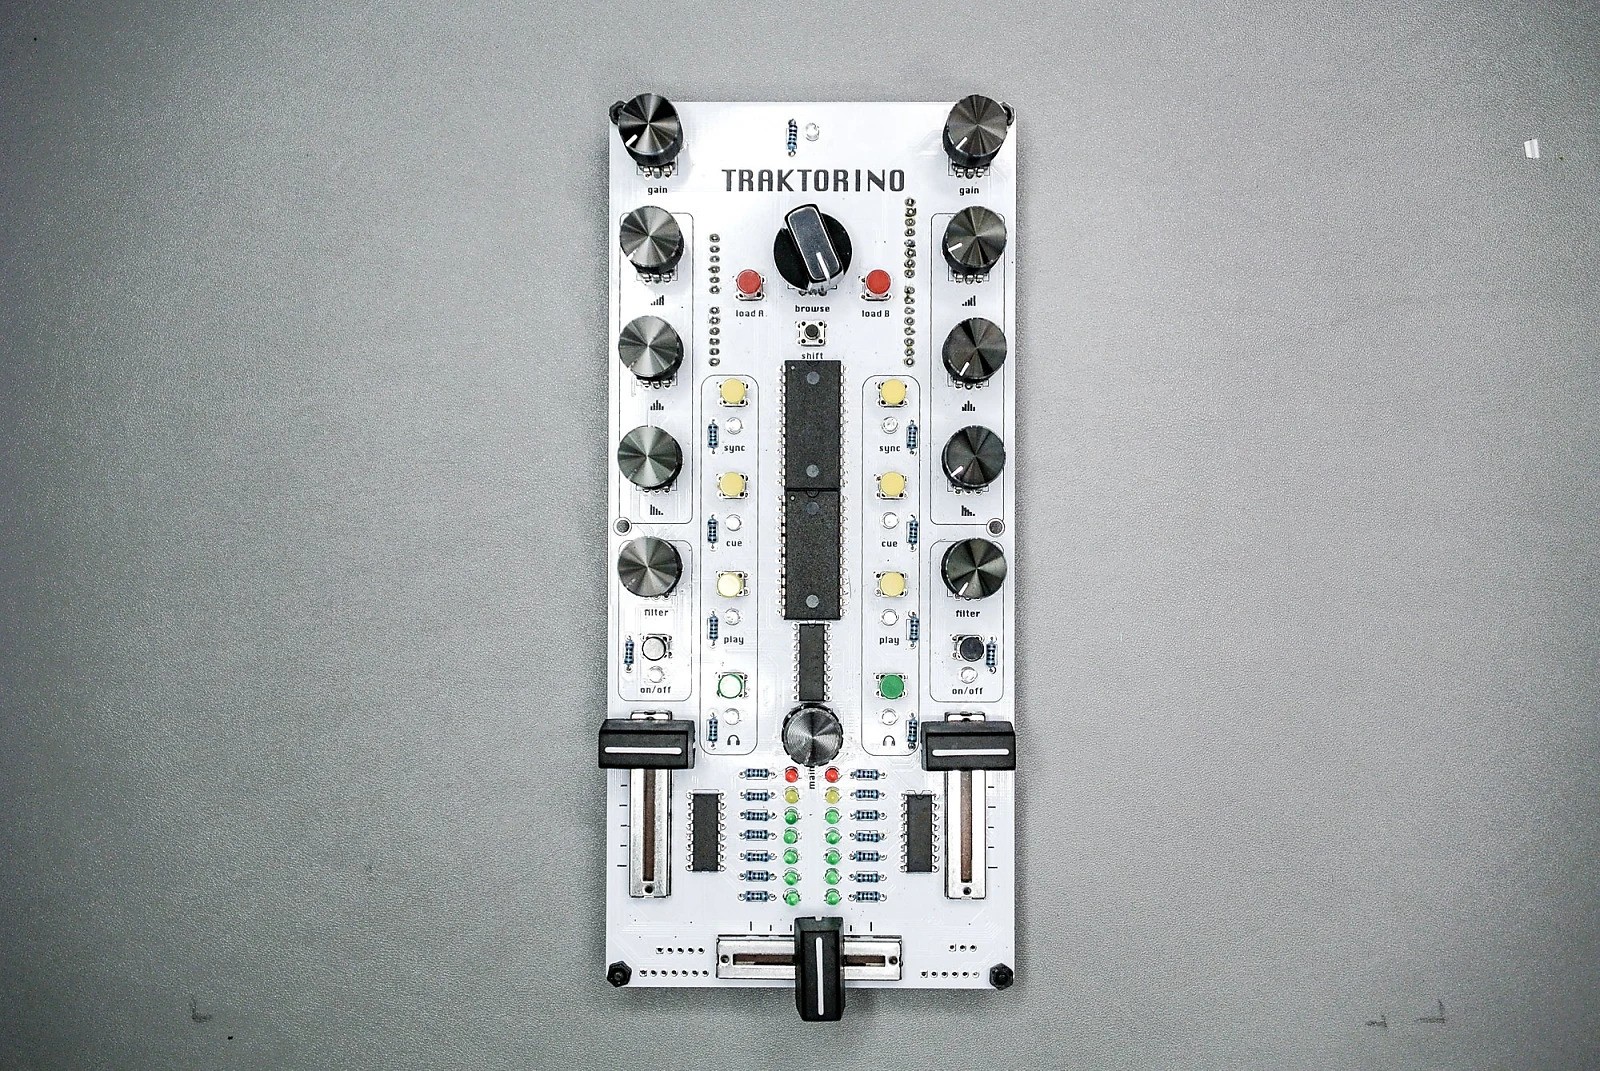
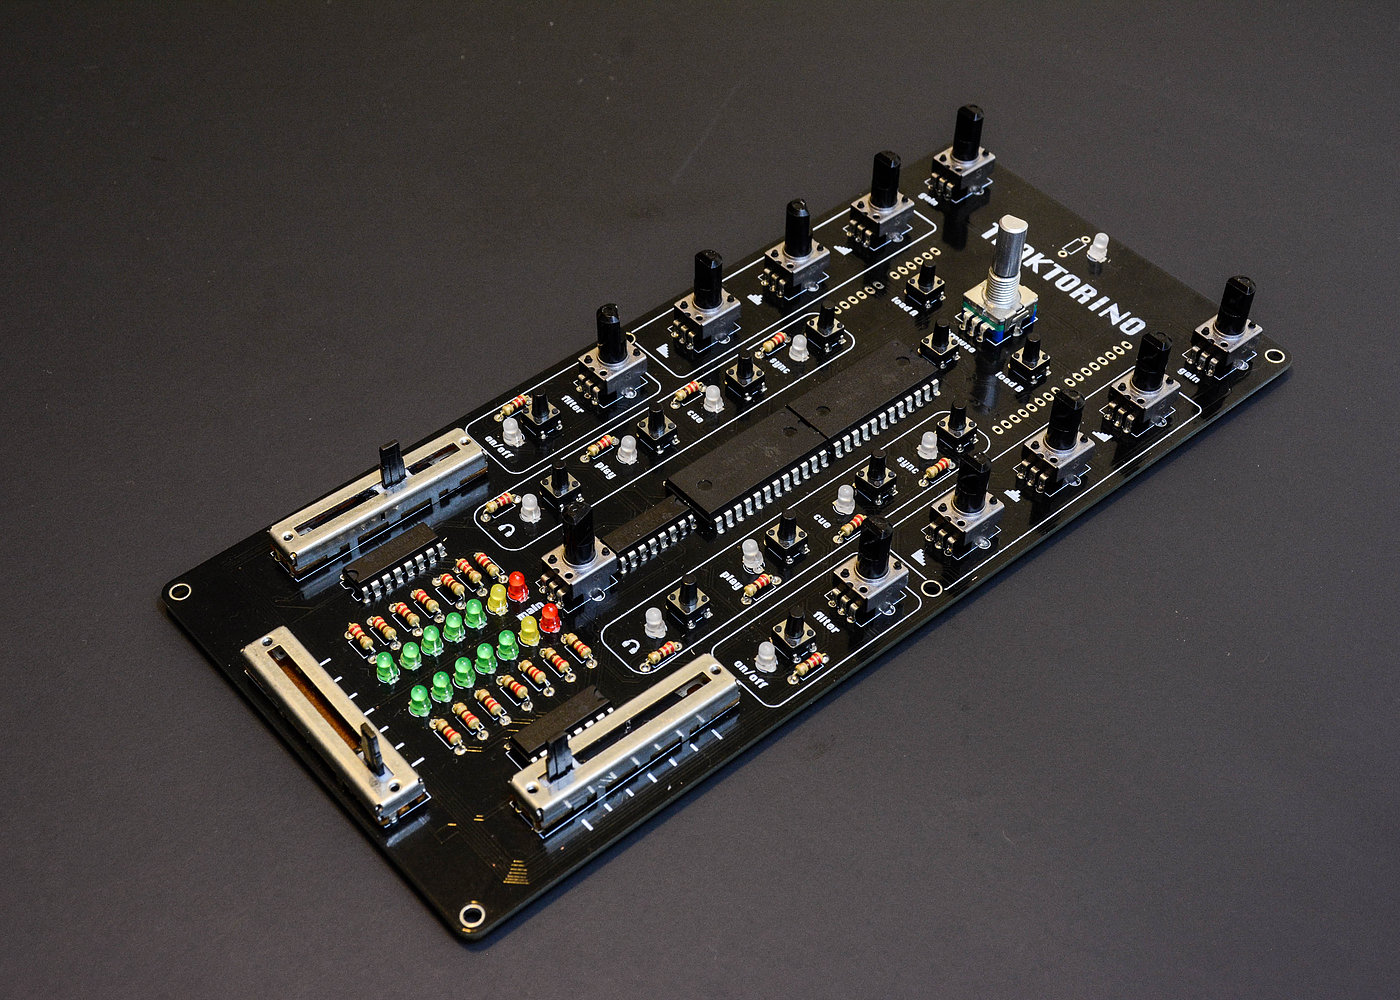
A highly customizable MIDI class compliant device designed for controlling Traktor
The Traktorino is a MIDI class compliant device, designed for controlling Traktor. Inpired by Traktor Z1, Traktorino has custom mapping for Traktor3. However, it can do much more than that. The Traktorino can control any software that accepts MIDI, like Ableton Live, Serato, FL Studio, Logic, etc.
